A helmet that looks good on the shelf can still be wrong where it counts – on your head at highway speed. If you are wondering how to measure for motorcycle helmet sizing without wasting money on the wrong fit, the job is simpler than most riders think. You need a soft tape, a mirror, and a clear idea of where a helmet should feel snug versus flat-out too tight.
Getting the size right matters for comfort, but that is only half the story. A loose helmet can shift, lift, and create hot spots because it moves when it should stay planted. One that is too small can feel brutal after twenty minutes, even if you forced it on and convinced yourself it would break in. Good fit is not guesswork. It is measurement first, then shape, then a real-world fit check.
How to measure for motorcycle helmet size
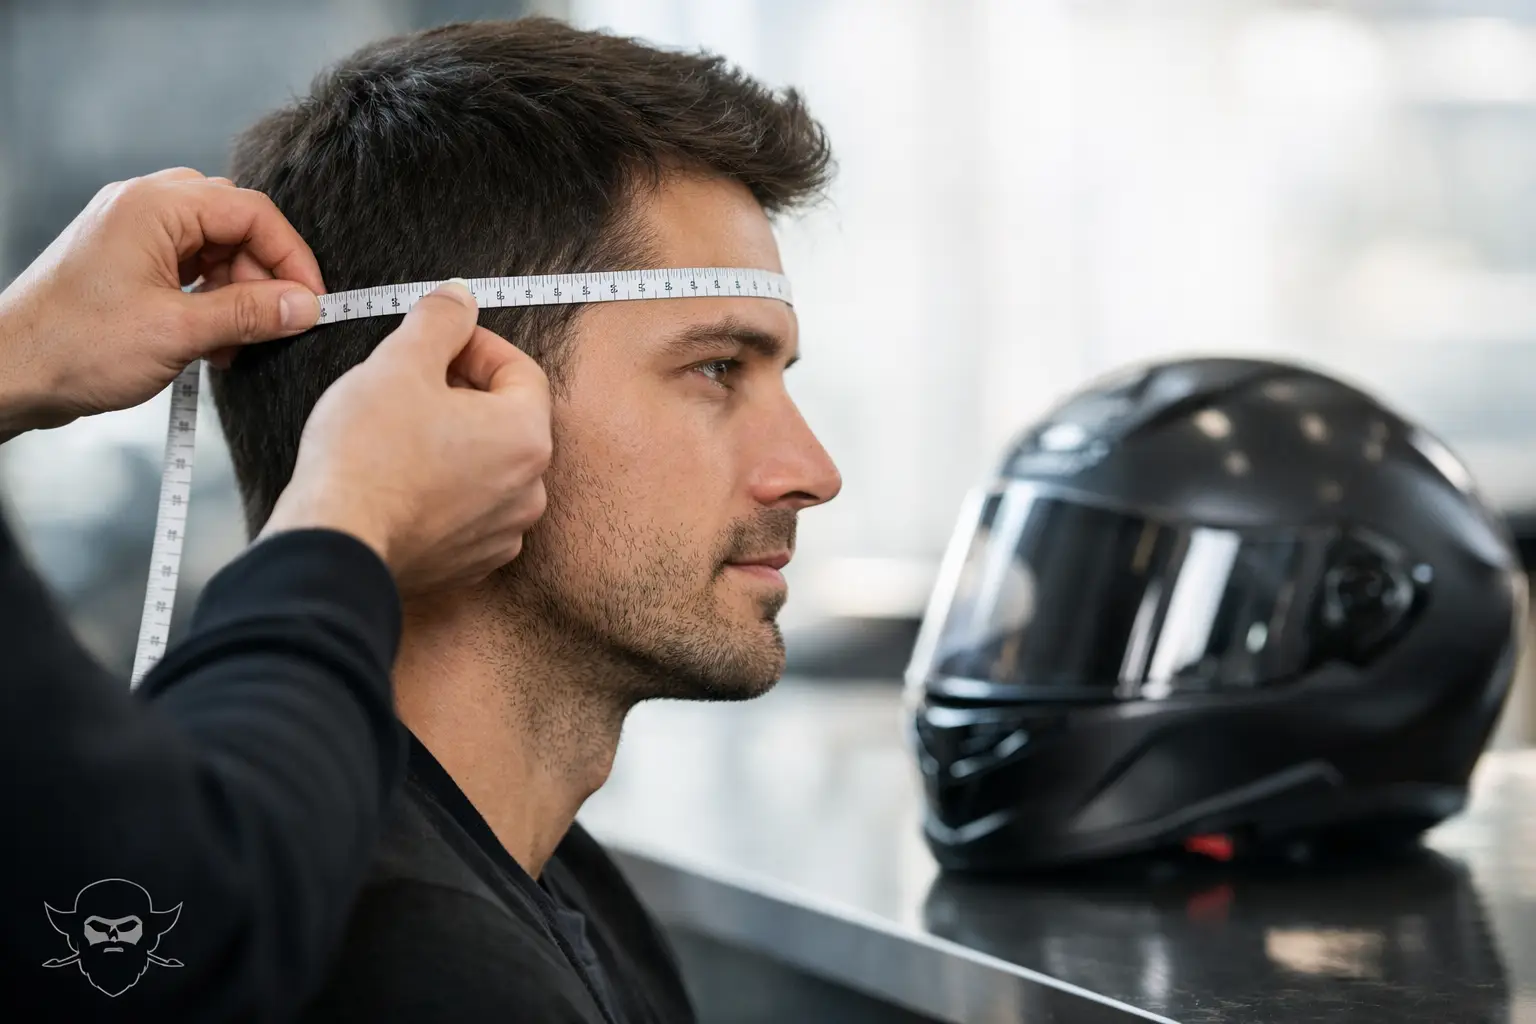
Start with a flexible cloth measuring tape. If you do not have one, use a string and then measure the string against a ruler. Stand in front of a mirror and wrap the tape around the largest part of your head, usually about one inch above your eyebrows and just above your ears. Keep the tape level all the way around. If it drops lower in the back or rides too high in front, your number will be off.
Pull the tape snug, not tight enough to squeeze your skin. You want the true circumference of your head, not a smaller number you got by cranking down the tape. Take the measurement two or three times. If you get slightly different numbers, use the largest one. Most helmet size charts are built around head circumference, usually shown in inches and centimeters.
For most adult riders, that measurement will place you into a standard size like small, medium, large, or XL. But that size is only your starting point. Different brands can run a little smaller or larger, and some use different internal shapes even when the size chart looks similar.
The number alone does not guarantee a good fit
This is where a lot of riders get tripped up. They measure correctly, order the size the chart suggests, and still end up with a helmet that does not feel right. That usually comes down to head shape.
Most motorcycle helmets are built around one of three general internal shapes: round oval, intermediate oval, or long oval. An intermediate oval is the most common, but not every rider falls into that shape. If your head is more round and you wear a narrow oval helmet, you may feel pressure on the sides. If your head is longer front to back and the helmet is too round inside, pressure shows up on the forehead and back of the skull.
That is why two riders with the exact same head measurement can need different helmets. Size tells you how big. Shape tells you whether the fit will hold up after an hour in the saddle.
What a properly fitted helmet should feel like
A new helmet should feel snug all the way around. Not loose, not sloppy, not shifting when you move your head. It should make full contact around your crown and cheeks without creating sharp pain. If you can slide fingers easily between your forehead and the liner, it is too big. If it feels like it is clamping one point of your skull while leaving other areas loose, the shape is wrong.
When you put it on, hold the straps and roll the helmet over your head. It should take a little effort. That is normal. Once it is on, fasten the chin strap and try moving the helmet side to side and up and down. Your skin should move with the helmet. If the shell rotates while your skin stays put, keep shopping.
Cheek pads matter too, especially on a full-face helmet. They should press against your cheeks firmly enough that it feels snug when you talk or smile. That pressure usually eases a bit as the liner breaks in. What you do not want is a helmet that already feels loose in the cheeks on day one.
How to test fit after you measure
After you measure for motorcycle helmet sizing and choose the chart size, wear the helmet indoors for at least 15 to 30 minutes. Do not judge fit in the first thirty seconds. A helmet can feel fine at first and then develop a pressure point quickly.
Pay attention to localized pain, especially on the forehead, temples, or sides of the head. General snugness is good. Sharp discomfort is not. If you remove the helmet and see light, even pressure marks, that is common. Deep red spots paired with pain usually mean the internal shape is wrong or the helmet is too small.
Try a roll-off test as well. With the chin strap secured, grab the rear of the helmet and try to roll it forward off your head. Then grab the front and try to push it back. A properly fitted helmet should resist both movements. It should stay planted, not peel off or shift dramatically.
Vision is another checkpoint. Your eye port should sit level and give you a clear field of view. If the helmet rides too low and crowds your sightline, or too high and feels unstable, the fit is off somewhere.
Common measuring mistakes that lead to returns
The biggest mistake is measuring in the wrong spot. Riders often wrap the tape too high on the forehead or let it angle downward in the back. That gives a smaller or uneven measurement and starts the whole process wrong.
Another problem is assuming your old helmet size is still correct. Liners compress over time. A helmet you wore for years may feel comfortable because it broke down, not because it was the perfect size from the start. If you are replacing an older lid, measure again from scratch.
Hair can throw things off too. If you usually ride with a skull cap, bandana, or similar headwear, measure with that in mind. The difference may be small, but small differences matter in helmet fit. The same goes for thick hairstyles or braids. Measure the way you actually ride, not the way you look five minutes after a haircut.
And here is one more: buying a larger size because the correct size feels snug. A motorcycle helmet is supposed to feel tighter than a ball cap. Liners break in. Shells do not shrink. If you size up just to avoid that new-helmet snugness, you often end up with a loose fit after a few rides.
Sizing for kids and occasional passengers
If you are measuring for a kid, use the same method: around the largest part of the head, level above the brows and ears. Measure more than once because kids do not always stand still for the first try. Start with the chart, then check for even snugness and secure retention.
Do not buy oversized with the idea they will grow into it. That might work for a sweatshirt. It does not work for protective gear. A poor helmet fit is a poor helmet fit, no matter how fast a kid is growing.
For occasional passengers, the same rule applies. Do not guess based on appearance. Measure, compare to the chart, and test the fit. If you are buying gear online and want fewer returns, this step saves time and money.
When you are between sizes
If your measurement falls right between two sizes, the right move depends on the brand, your head shape, and how the specific helmet fits. In many cases, the smaller size is the better starting point because comfort liners break in with use. But if you already know a brand runs small or your head shape tends to create pressure points, the larger size may be the safer call.
This is where product sizing notes and rider support matter. A good gear shop will tell you if a model runs true to size, narrow, or generous. That kind of fit guidance is worth more than a generic chart because it reflects how the helmet actually fits riders in the real world.
Fit should match the way you ride
Cruiser riders, daily commuters, weekend tourers, and two-up riders all want the same basic thing – a helmet that stays secure and feels right mile after mile. If your helmet fit is off, everything else suffers. Wind noise gets worse. Fatigue sets in faster. You start fidgeting with gear instead of focusing on the road.
That is why learning how to measure for motorcycle helmet fit is worth doing right the first time. It cuts down on returns, helps you buy with more confidence, and gives you a better shot at a helmet that feels road-ready from the start. Blackbeard’s Motorcycle Gear is built around that same idea: gear should fit right, work hard, and look like it belongs on the bike.
Take the measurement carefully, trust the chart as a starting point, and pay attention to shape and pressure points before you commit. A good helmet should feel snug, solid, and ready to ride – not like something you are hoping will somehow work out later.